How To Integrate Salesforce With Cforms (and have multiple Salesforce Web to Lead forms in WordPress)

If you use Salesforce and you have a WordPress powered site you may be frustrated. Salesforce is a wonderful tool for managing your customers and potential leads. WordPress is the best CMS out there today (I am a little biased, but it’s true). So why can’t they play together?
There IS a solution out there now… The WordPress-to-lead for Salesforce CRM Plugin by Yoast is a noble effort. It’s easy to use, which is more than I can say for the instructions I will be giving below (but even if you’re not a coder, you should be able to follow). The problem is that it only offers one form.
But what if you are running multiple campaigns? What if you need different forms? You can use the Web to Lead custom forms that Salesforce offers, but if you want to have required fields, you’ll need to code special JavaScript to validate those forms… That’s not a very good solution either.
Also, what if you want to keep a backup of the leads. The Web to Lead forms have a limit of 500 leads a day. While they assure you that you will be emailed the rest of the leads so you can input them yourself, you may want a central place to track your leads aside from Salesforce.
This is where Cforms II comes in. Cforms is my favorite WordPress forms plugin. It offers a beautiful GUI backend, many features, themes and even form tracking. Wouldn’t it be great if you could combine the best WordPress form plugin with the best CRM in town?
Note:
Once you make these adaptations you should be aware that EVERY form you create with Cforms on your site will try to submit the information to Salesforce. If you would like only SOME of your forms to be submitted see the appendix at the end of the post.
Step 1 – Hack Cforms
I often hack plugins. It is laborious, trying to figure out the inner workings of certain plugins. They tend to be poorly commented and many best programming practices are avoided. In contrast, Cforms is beautiful. Not only is it understandable as code; but the author created a file: “my-functions.php” whose sole purpose is to allow other coders to add functionality to the plugin without having to hack. This is what we will be “hacking”.
Find the following block of code:
And replace it with this:
Explanation:
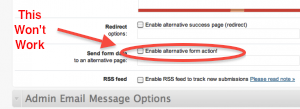
Initially, I thought that the “Send form data to an alternative page” option under “Core Form Admin/Email Options” but whatever I did, the forms, when submitted, got stuck on the dreaded “One moment please…” Ajax message. The answer was submission via cURL (ask your neighborhood coder to explain). In addition there is some data processing involved so that the form contents will be understood by Salesforce.
Step 2 – The Form
The next stage is building your forms in Cforms.
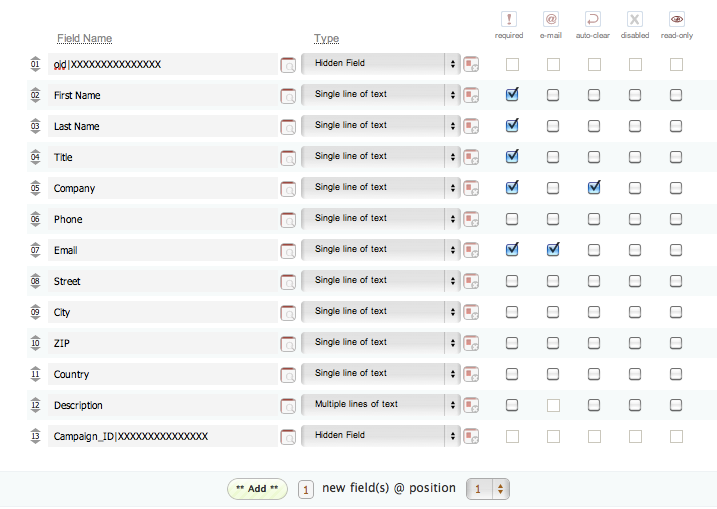
I am assuming that you’ve already built some web-to-lead forms in Salesforce, and you like the idea of having a form engine running them with form validation and database tracking. If you haven’t yet, please create a form in Salesforce. It is not easy to figure out how to do this, and the salesforce help sometimes omits important information, not to mention needing an account to access the help. So getting the code for a web-to-lead form warrants a post of it’s own, but that will have to be for another time.
Once, you have the code for the form go through it and add to your Cforms form a field for each field that you have in the Salesforce form (if you add extra fields I don’t know if Salesforce will process that information).
One thing to keep in mind when doing this is that you should make sure to name the fields EXACTLY as they do. Each field in the Salesforce code begins with a
For example:
So you want to call your first Cforms field “Company” and your next one “First Name”.
When you’re done adding all the fields there are a few more “hidden” fields that you will need to add:
- In position #1 add a field.
- Under “Type” change the field from “single line of text” to “hidden field”.
- In the “Field Name” type ‘oid|’ and then without spaces your Salesforce organization ID number.
To find your oid refer back to your form code provided by Salesforce. About 10-15 lines down you should see two lines like this: